
Welcome to Week 2. You built your first application in the last post — now it’s time to understand what’s actually happening every time a page loads and submits. This post covers three closely related topics: the building blocks you place on a page (items, buttons, regions), and the lifecycle that governs when each of them actually runs. Understanding this sequence is one of those things that, once it clicks, makes almost every future debugging session faster.
"Every APEX page runs the same lifecycle, every single time — the same order, whether the page has three items or three hundred."
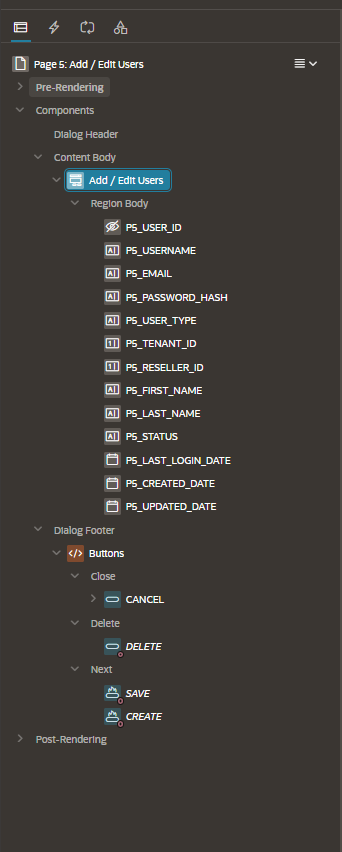
Let’s start with the building blocks, since understanding what each piece is makes the lifecycle section that follows much easier to absorb.
Part 1: Page Items and Buttons
Page Items
A page item is any field that holds a value — a text field, select list, checkbox, or hidden item. Items follow a strict naming convention in APEX: P followed by the page number, then an underscore, then a descriptive name — for example, P1_USERNAME on Page 1, or P5_ORDER_STATUS on Page 5.
Items can be:
- Visible and editable — a standard text field a user types into
- Display only — shows a value but can’t be changed
- Hidden — holds a value (often passed via URL, as we covered in an earlier post) without being visible on screen at all
Buttons
Buttons trigger actions. Each button has an Action property that determines what happens on click — most commonly “Submit Page,” which sends the page’s current item values to the server and runs through the processing lifecycle we’ll cover in Part 2.
Buttons can also be configured to run purely client-side logic (via a Dynamic Action, which we’ll dig into properly in Week 2’s later posts) without a full page submission at all — useful for lightweight interactions that don’t need a server round-trip.
Part 2: Regions & Region Types
Regions are the containers everything else lives inside. Choosing the right region type for the job matters more than it might seem at first glance.
Static Content — a simple container for text, HTML, or a mix of items and buttons. This is what we used in an earlier post’s welcome-message example.
Classic Report / Interactive Report / Interactive Grid — different flavors of tabular data display, each with different strengths (Interactive Reports give end users filtering and export tools; Interactive Grids allow inline editing).
Form — typically auto-generated alongside a report when you use the “Report and Form” page type we used to build your first application.
Chart — visual data representation, which we’ll cover properly in Phase 3 of this series.
Container regions — a special type used purely for layout and grouping, letting you organize multiple child regions into tabs, accordions, or side-by-side columns without holding data itself.
Quick Example: A Static Region with a Button
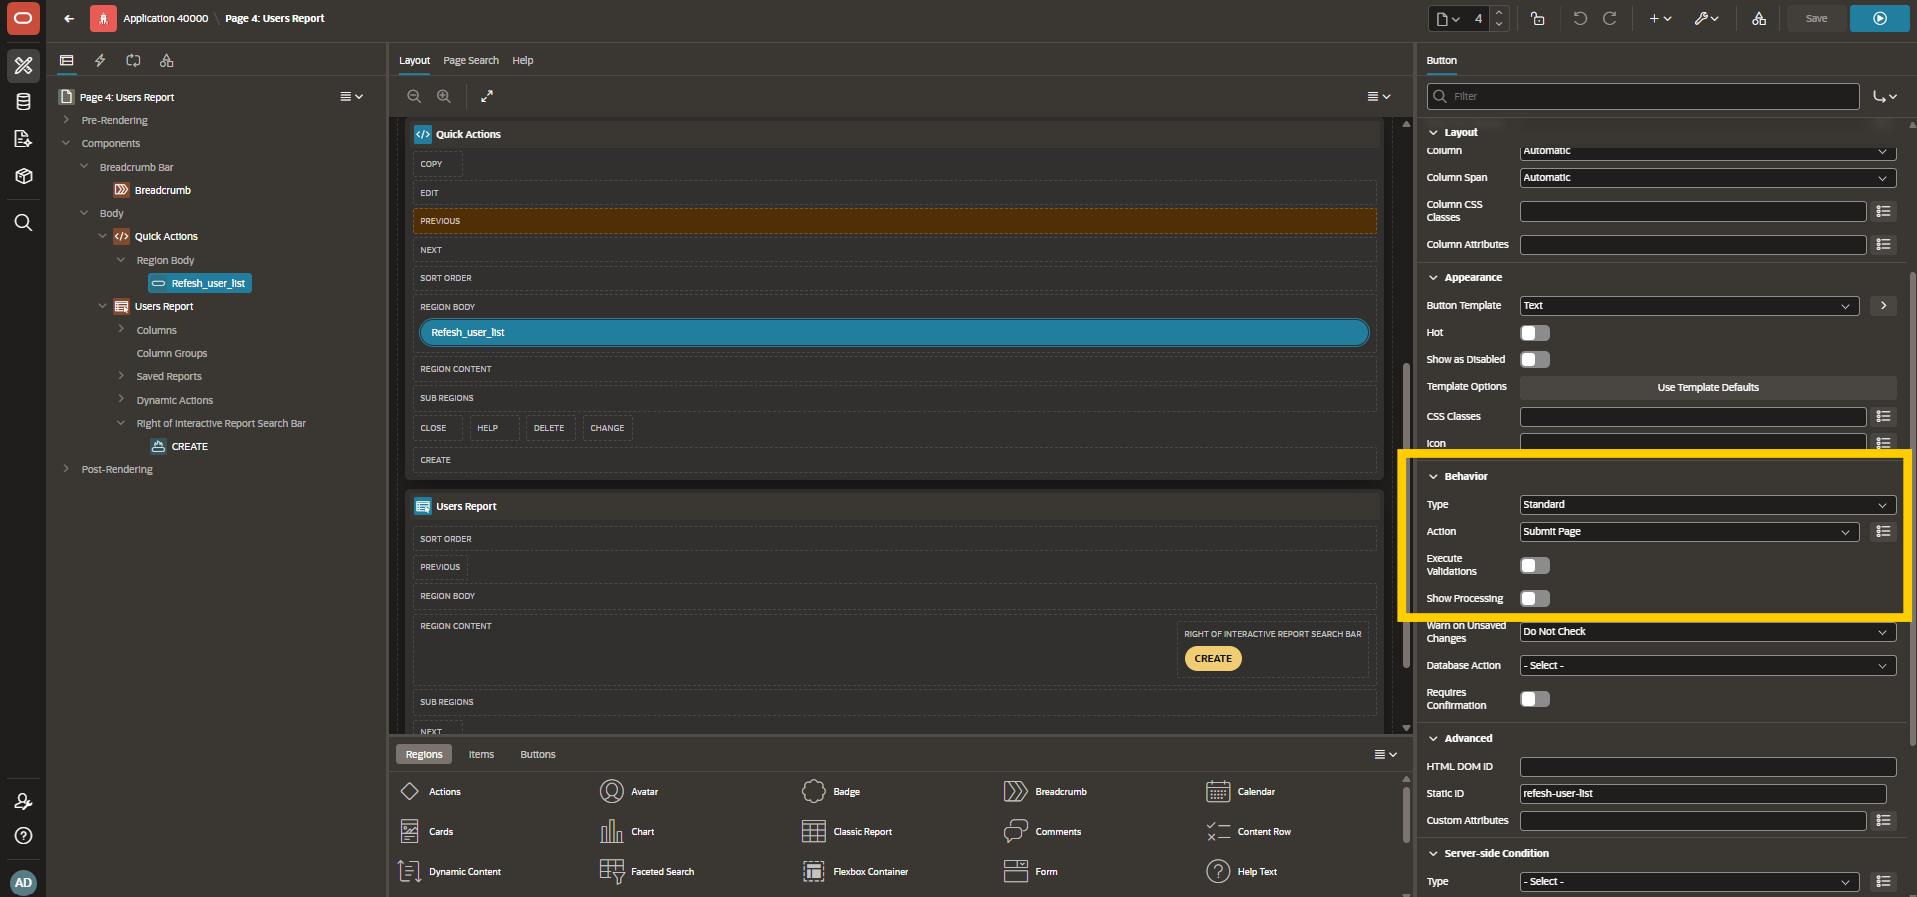
Building on Application 40000’s erp_adm_users report page, here’s a small addition to make this concrete:
- Add a new Static Content region above your existing report, titled “Quick Actions”
- Inside it, add a button labeled “Refresh User List”
- Set the button’s Action to “Submit Page,” and its Behavior → Execute Validations to “No” (since this button isn’t submitting form data, just triggering a refresh)
Part 3: Page Rendering & Processing Lifecycle
This is the concept that ties everything together. Every APEX page follows the same two-phase lifecycle, every single time: Rendering happens when the page loads, and Processing happens when the page is submitted.
The Rendering Phase (Page Load)
When a user requests a page, APEX runs through these steps in order:
- Session State is checked — existing item values from the session are loaded
- Before Header processes run — any PL/SQL configured to run before the page’s HTML header renders
- Regions render — reports query their data, items pull their source values
- After Regions processes run — any final PL/SQL that needs to run once the page structure exists
- The page is sent to the browser
The Processing Phase (Page Submit)
When a user clicks a button that submits the page, a different sequence runs:
- Item values are posted — whatever’s currently in each item field gets sent to the server
- Validations run — checking that submitted values meet whatever rules you’ve defined (we’ll cover validations properly in an upcoming Week 2 post)
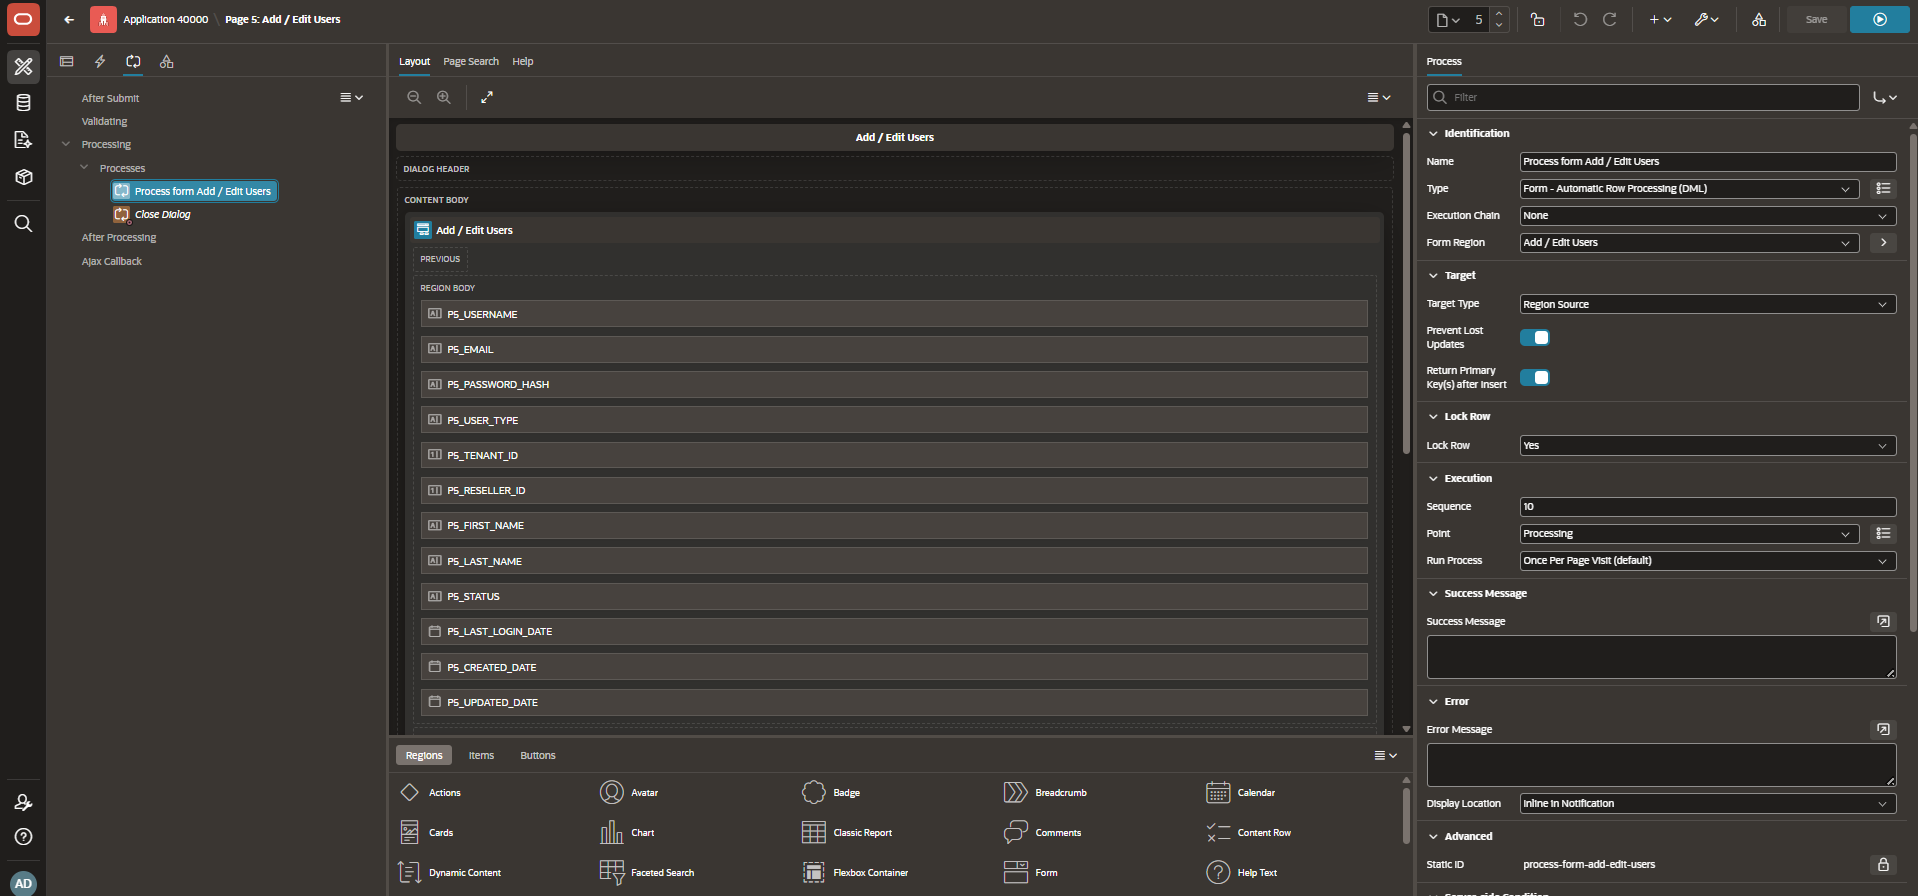
- Processes run, in their defined order — this is where your INSERT/UPDATE/DELETE logic typically lives, following the same PL/SQL patterns from the previous post
- Branching occurs — APEX determines which page to show next based on branch conditions
Why This Order Matters
Understanding this sequence explains a lot of behavior that otherwise seems confusing. For example: if a validation fails, none of the processes after it run — the page returns to the user with an error message instead. This is exactly why validations exist as a separate phase before processing, rather than being bundled into the same step: it gives APEX a clean checkpoint to stop bad data before it reaches your INSERT or UPDATE statements.
What’s Next
With items, buttons, regions, and the page lifecycle now understood, next in the series we’ll cover Static Content & HTML Regions and Page Templates & Layout — going deeper into how to structure and style what you’ve just learned to build.
This post is part of a 20-week Oracle APEX training series covering everything from foundational architecture through AI-powered enterprise development in APEX 26.1. Follow along as we work through each topic in order.